For Monterey 12.1,BluetoolFixup,BrcmPachRam,BrcmFirmware,latest commit
alpha
Kawaiintu (neo Moebuntu)(旧Hackintosh夢日記)
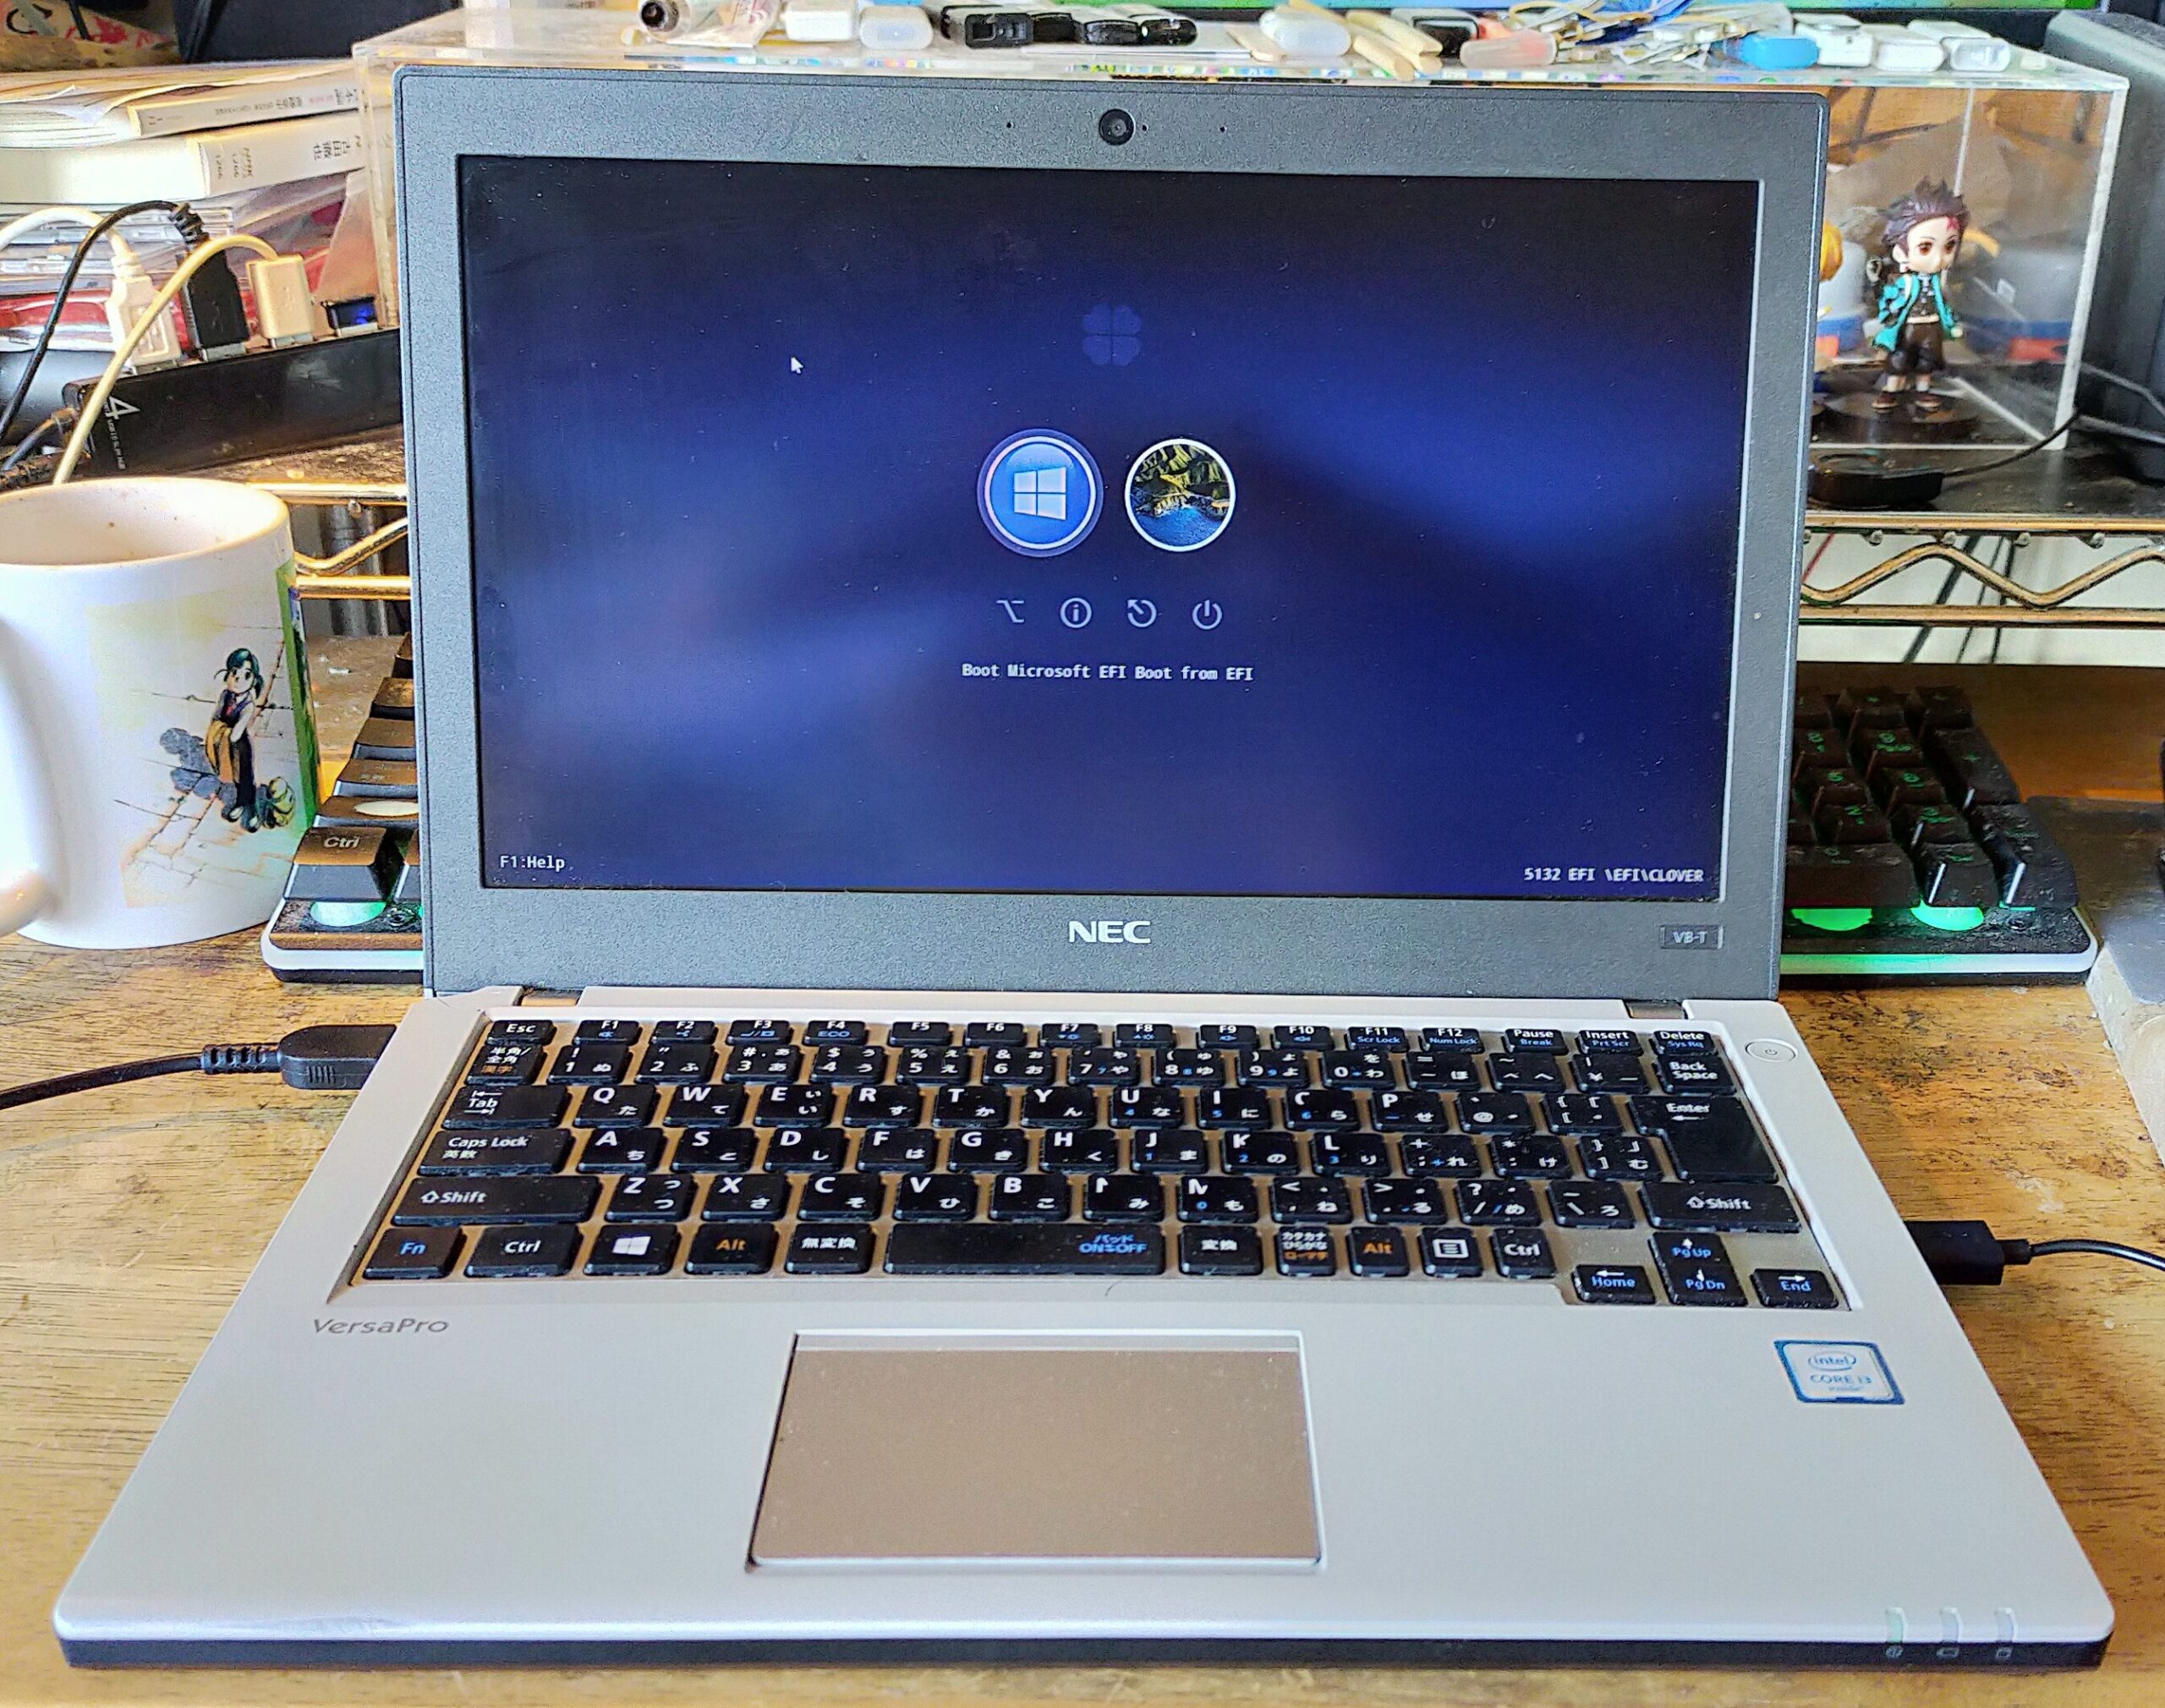
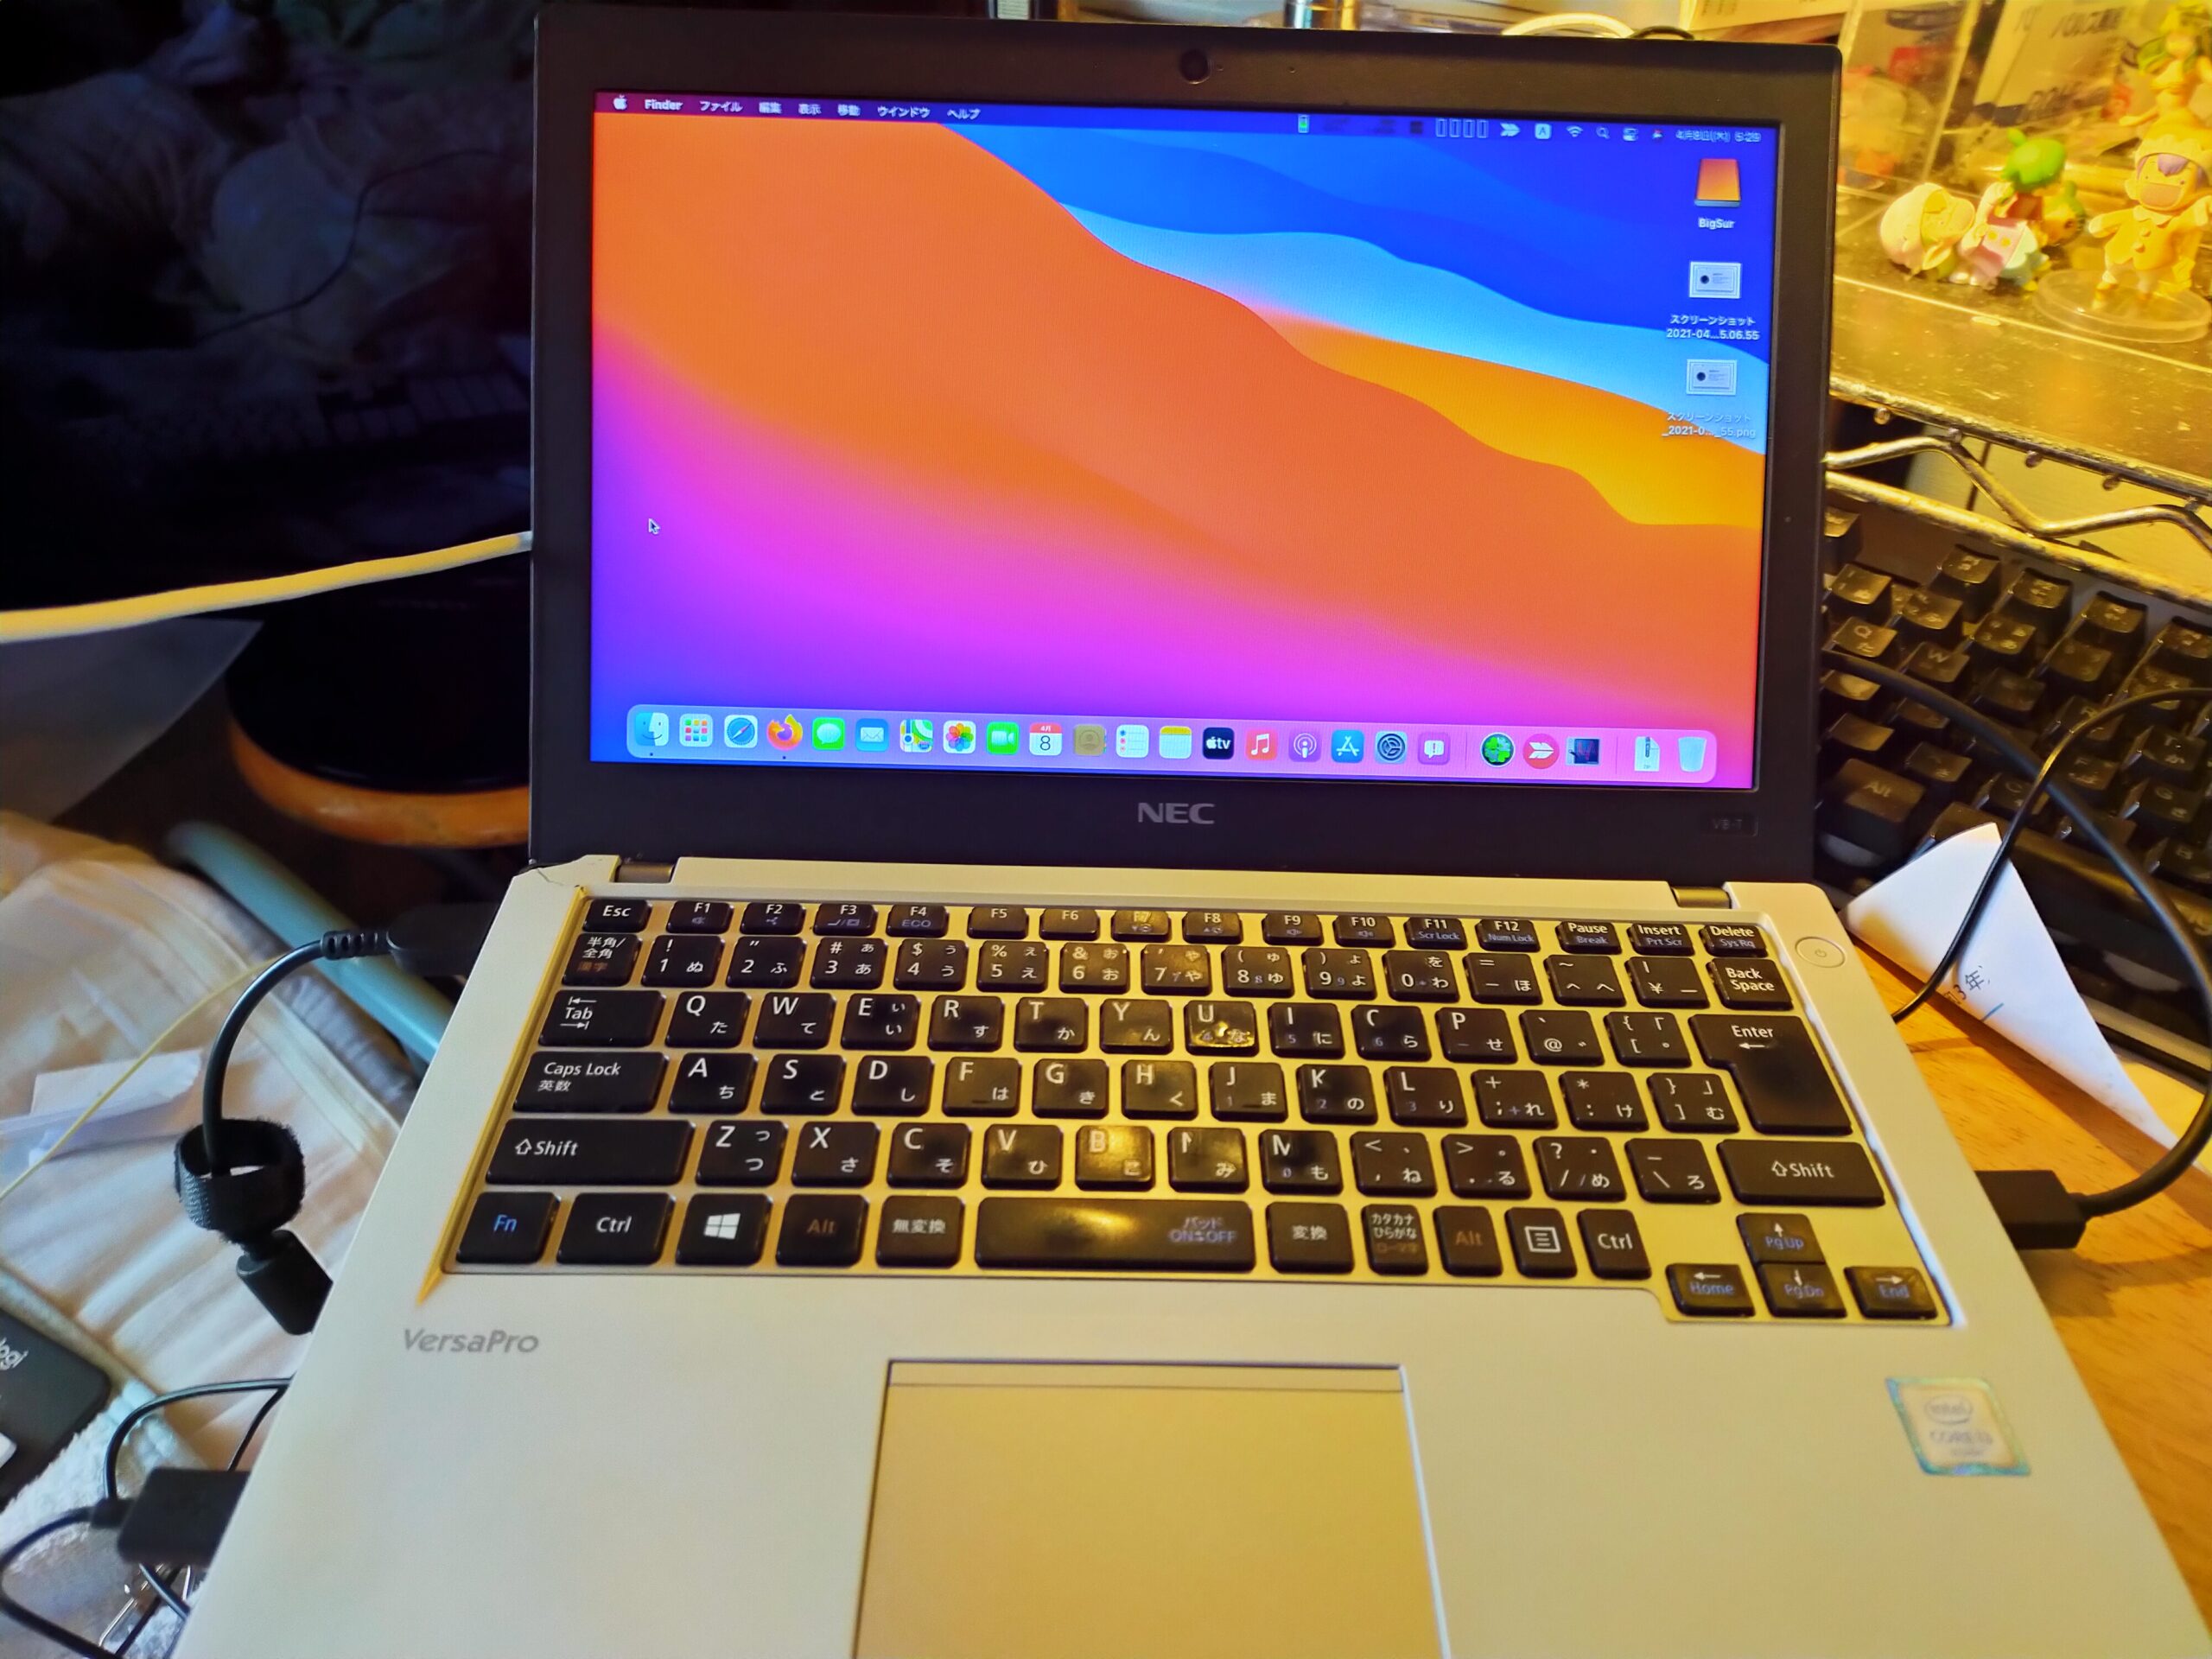
Versapro 12インチ NEC VK23VB-T(VK23LBZDT) Win10 第6世代Corei3 4G HDD 500G Bluetooth office有 中古パソコン(訳アリ品)を約8000円で、楽天で見つけました。
訳アリ品の理由は、ACアダプタがないこと、ベゼルの左横の小さなカケとキーの文字表示すれがあるためでしたが、説明には書いていたLCDへのキー傷はなく、利用には問題はありませんでした。(普通のことですが、中古なのでバッテリーは2時間くらいしか持ちませんでした。ちなみに、新品バッテリーは17,000円します^^;)
I found a used PC (Product defect) of “Versapro 12 inch NEC VK23VB-T (VK23LBZDT) Win10 6th generation Core i3 4G HDD 500G Bluetooth office available” at Rakuten for about 8000 yen.
The reason for the product defect was that there was no AC adapter, there was a small chip on the left side of the bezel and the character display of the key was rubbed.And the key scratch on the LCD that was written in Rakuten’s explanation selling.There was no problem in using it and it work properly. And There is no key scratch on the LCD (But,because it is used, the battery lasted only about 2 hours. This is normal. By the way, a new battery costs 17,000 yen.)
1.初期テストと初期バックアップ
Windows10 Pro Ver.2004が入っていたので、アカウントをまず自分のものにして、Lanをつないで、アップデートを3時間くらいかかってしました。
AOMEI BACKUPPERがSAMBA経由でできるということで、同ソフトのUSBメモリで起動を試みましたが、できませんでした。そのため、ClonezillaでHDDをフルバックアップしました。
それから、Windows10 Proの最新である20H2のUSBメモリを使って、アップグレード。その後、ネットからアップデートしました。終わってから、2度目もClonezillaでのフルバックアップをしました。
こうして、最低限でもWindowsマシンとして使う基礎部分を作りました。
1. Initial test and initial backup
Since Windows10 Pro Ver.2004 was included, I first made my account my own, then connected my LAN, and updated it in about 3 hours.
AOMEI BACKUPPER was able to create a backup file via SAMBA, so I tried booting with the USB memory of the same software, but I couldn’t. Therefore, I made a full backup of the HDD with Clonezilla.
Then, I upgraded the system using a USB memory containing the latest version 20H2 of Windows 10 Pro. After that, I updated it from the net. Next, I did a full backup with Clonezilla for the second time.
In this way, at the very least, I created the basic part to use as a Windows machine.
2.Hackintoshとしての仮立ち上げと評価
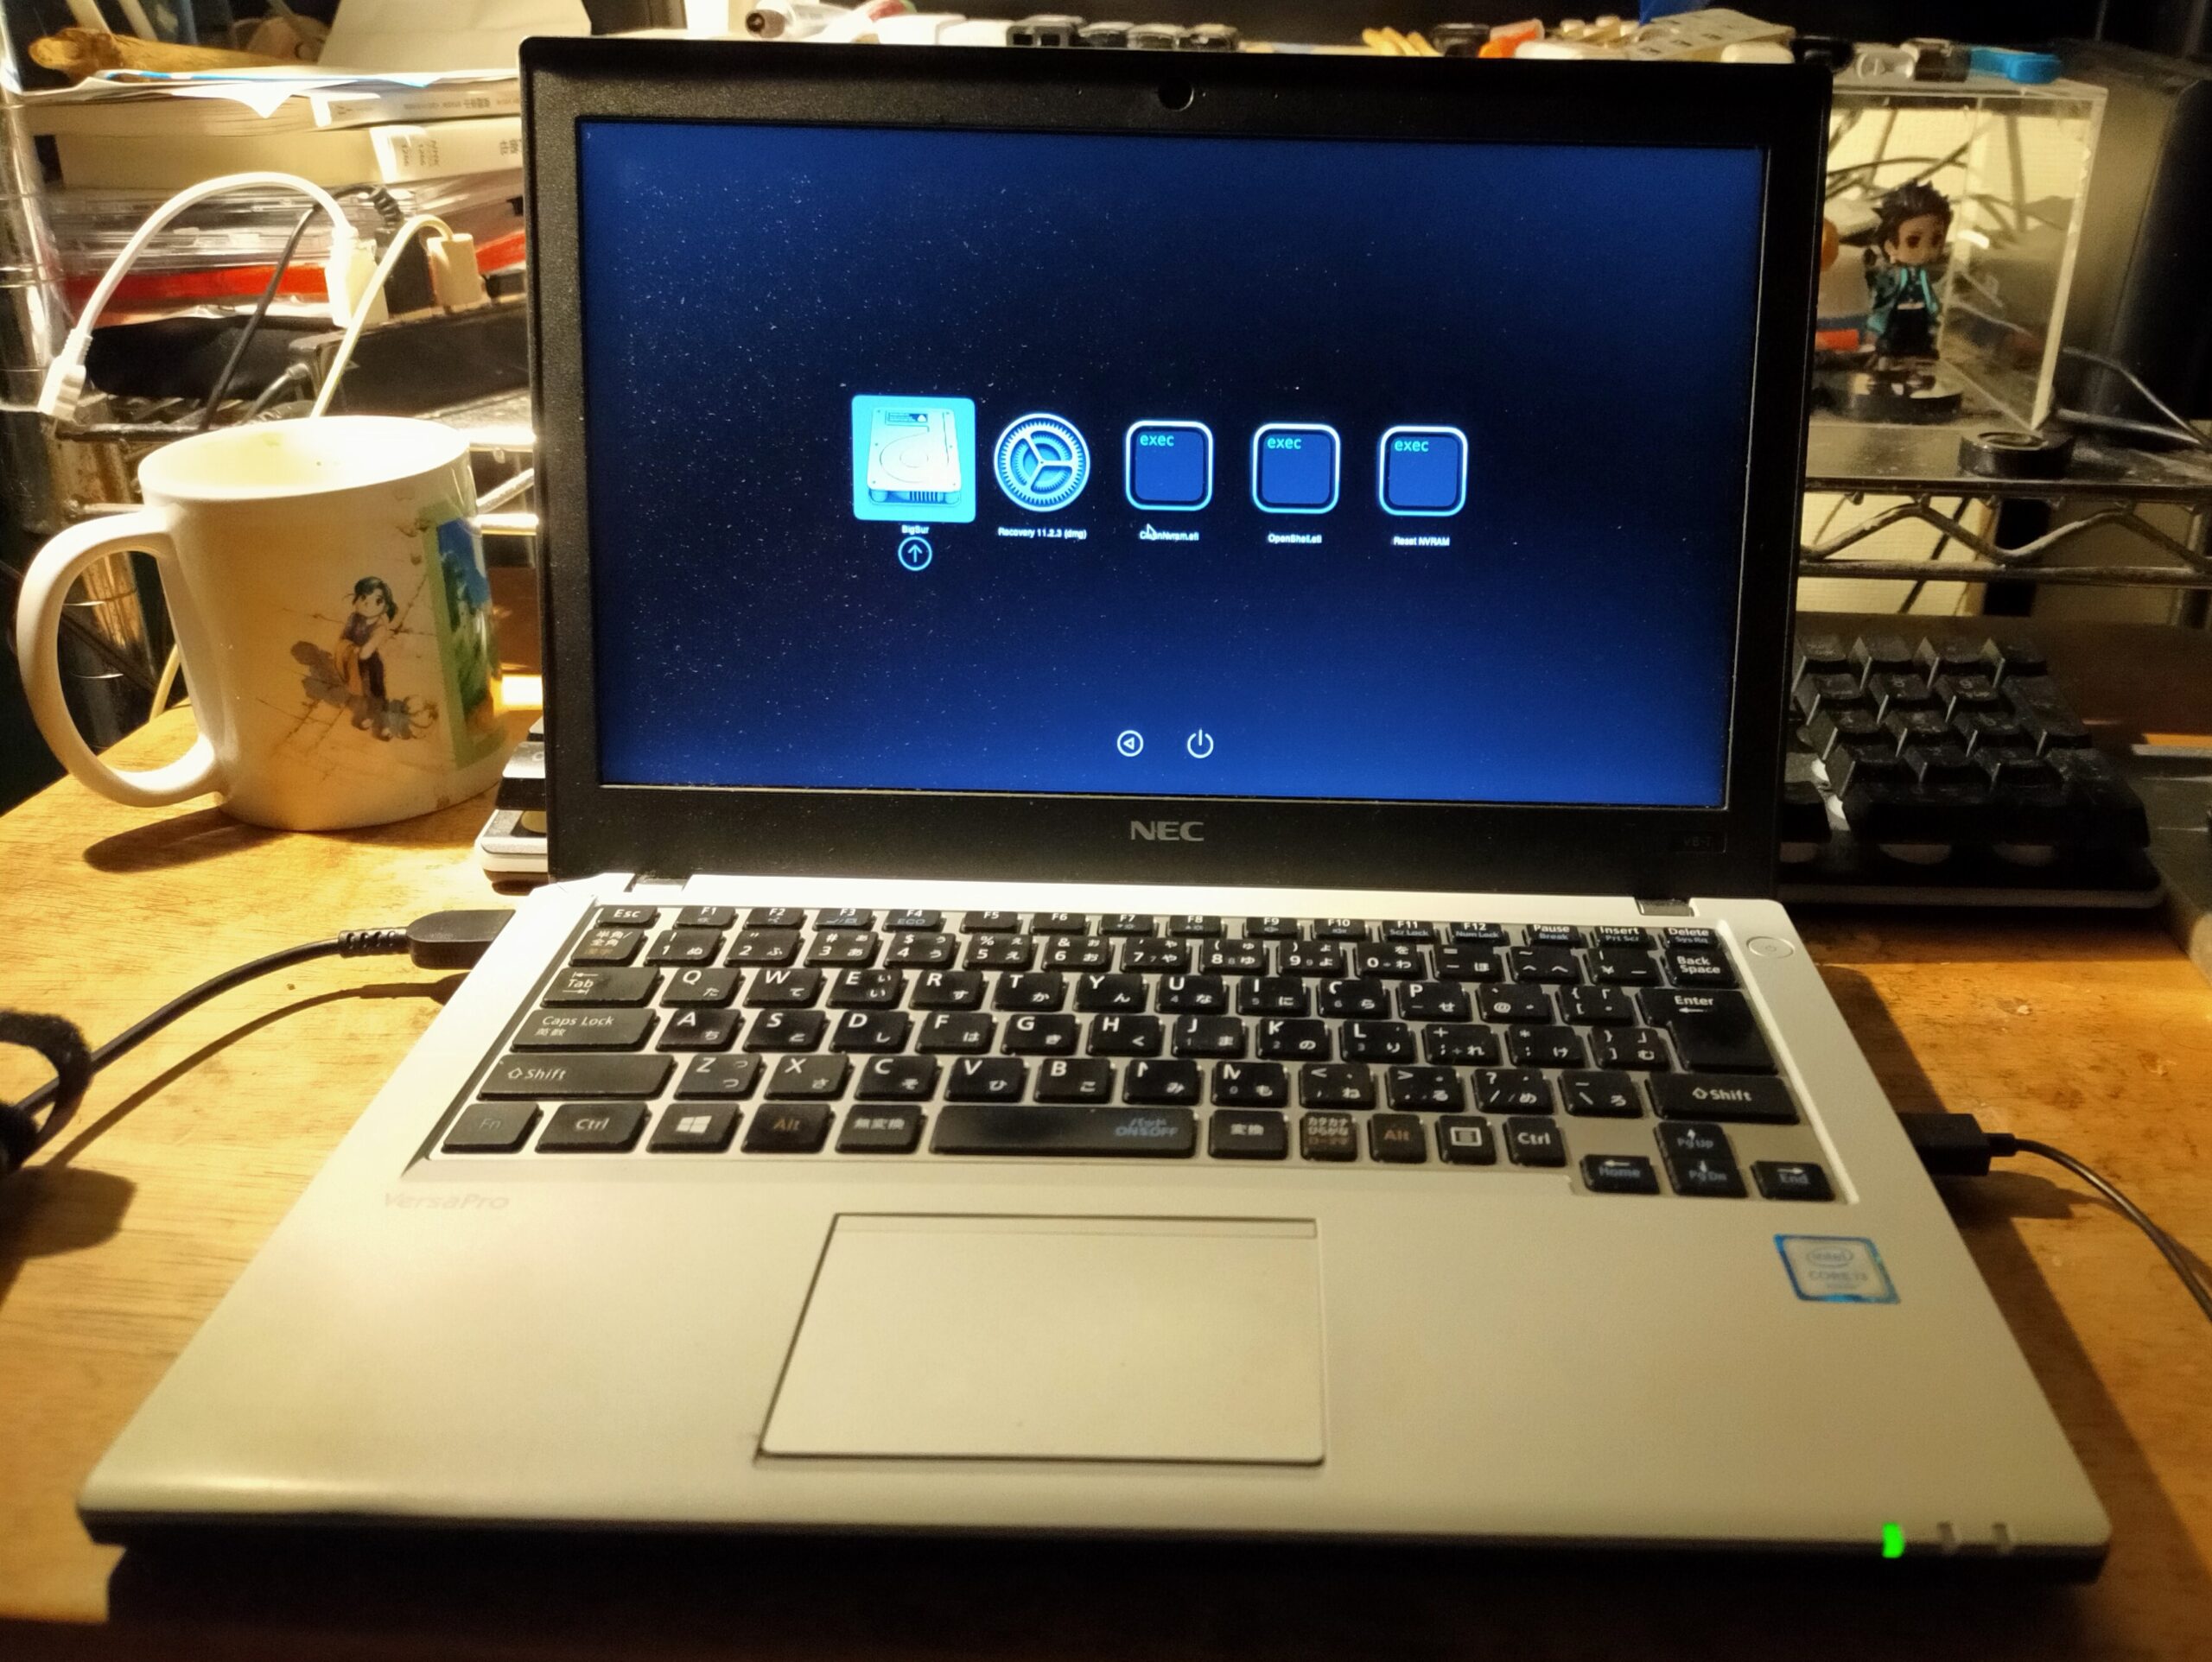
次にACPIパッチをしないできるだけジェネリックなClover Boot Loaderで、BigSurのUSBメモリインストーラーをつくりました。USB3.0のSSDをシステム領域とし、インストール、ブートを試しました。成功しました。(ただし、IGPU(UHD520)への切り替えに失敗したため、X260のDevice設定が有効であることがわかりました)
Kextなどを入れることによって、デバイスの稼働と、ハイバネーションの確認までできました。その詳細が以下のWebページです。
Only$80 Laptop Big Sur!! たった8000円のBigSurノートPC
2. Temporary launch and evaluation as Hackintosh
Next, I made a USB memory installer for Big Sur with Clover Boot Loader, which is as generic as possible without ACPI patching. I tried installing and booting using a USB3.0 SSD as the system area. It was successful.(I found that the X260’s IGPU (UHD520) settings work fine because the laptop failed to switch to the IGPU at boot time)
With Kext etc., I was able to operate the device and even check the hibernation. The details are on the following web page.
Only$80 Laptop Big Sur!! たった8000円のBigSurノートPC
3.機体に合わせたACPIパッチと試験
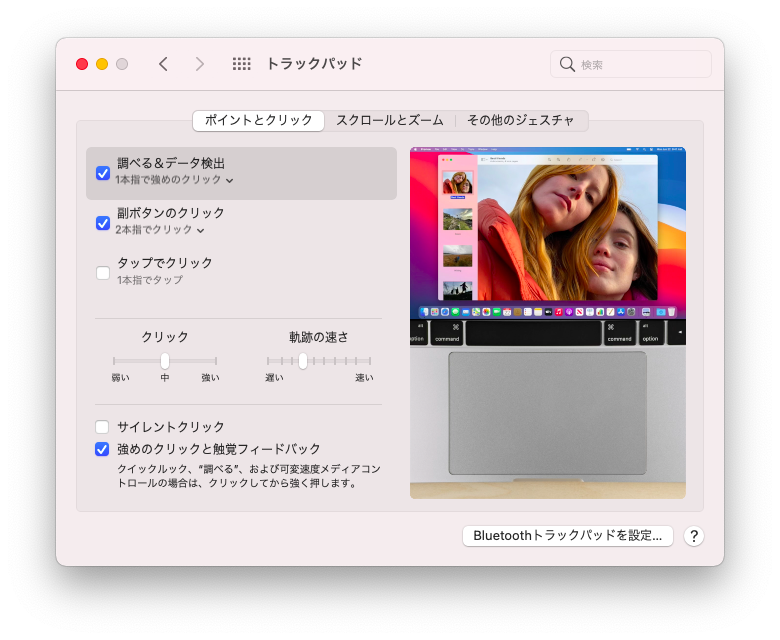
ジェネリックなCloverでは、まだバッテリーとトラックパッドが動きませんでした。そして、ハイバネートも機能的に不調でした。
そのため、ACPIにパッチをあてて、動くかを試していきます。Lenovo X260と考えてT460のパッチをあてていきます。初めにすべてのパッチをあててみましたが、LCDの輝度の変更(キーボードでの変更を含む)がうまく動かなくなりました。デバイス名の変更に関係があるかと、X260,T460のホットパッチをあててもみましたが、反対に機能が動かなくなったり立ち上がらなくなります。そのため、手法を変えて最初に必要なバッテリーと電源(ハイバネート)のパッチをまず当てて機能させる方法に考えを変えました。T460のパッチファイルの中で、2_IGBE_PRW.txtと4_battery_fan.txtをまず適用して起動と(今までうまく行った)機能に問題がないことの確認をしておきます。
3. ACPI patches and tests for this PC
With the generic Clover, the battery and trackpad still didn’t work. And hibernate was also functionally ill.
Therefore, I will patch ACPI and try to see if it works. I think of it as a Lenovo X260 and patch the T460. I applied all the patches first, but the LCD brightness changes (including keyboard changes) didn’t work. I tried applying hot patches for one or both of the X260 and T460 to see if it was related to the device name change, but on the contrary, the function stopped working or I could not boot. Therefore, I changed the method to the method of first applying the necessary battery and power supply (hibernate) patches to make it work.In the T460 patch file, first apply 2_IGBE_PRW.txt and 4_battery_fan.txt to the DSDT, and make sure there are no problems with the boot and features (which have worked so far).
まず、ハイバネートについては、うまくWakeする場合といかない場合があり、問題の切り分けをしました。
USBキーボードをつけていると、うまくWakeできます。そのさい、Wake後にもLEDが点滅したままでした。(本来はWakeしたら点灯に戻るはずです。)そして、その時にはシステムの入ったUSB-HDDケースのランプが点滅したままです。
反対にUSBキーボードをつけずに、ハイバネートに入ると、システムの入ったUSB-HDDケースのランプが消えます。キーなどを押してもハイバネートからWakeできません。
このように、Systemの入ったSSDにアクセスできないことで、Wakeが阻害されているようなので、一時的にUSBでつないでいたSSDを内部ドライブにすることとしてみました。すると、必ずWakeできるようになりました。外部SSD(USB-SSD)では無理なようです。1つ問題が解決しました。
First of all, regarding hibernation, there are cases where it wakes well and cases where it does not work, so I isolated the problem.
The laptop can be waked well when a USB keyboard is connected. At that time, the LED kept blinking even after Wake. (Originally, it should return to lighting after Wake.) And the lamp of the USB-HDD case containing the system keeps blinking at the time of hibernation here.
On the contrary, if the laptop computer enters hibernation without attaching the USB keyboard, the lamp of the USB-HDD case containing the system will go out. I cannot wake from hibernate even if I press a key.
In this way, Wake does not seem to work because the SSD containing the System cannot be accessed. I temporarily moved the SSD that was connected via USB to the internal drive. Then, I was able to wake up. Hibernate seems to be impossible with an external SSD (USB-SSD). One problem has been resolved .
次に電源管理の問題です。ACPIパッチをあてても、macOSのシステム設定設定にある電源管理の中でバッテリーを認識している様子はありませんでした。その表示はバッテリーの容量が0%とされ、実際に機能している様子はありませんでした。私はDSDT内のデバイス名の問題があるのかと考えました。そのため、もう一度、X260,T460のACPIのホットパッチを、組み合わせ的に適応しましたが、効果はありませんでした。
あきらめかけてきた中、ジェネリックなACPIの中にも、電源管理に関するものがあることに気が付きました。Dortaniaから持ってきた、SSDT-EC-USBXとSSDT-PLUGです。もしかするとこれらがオーバーライドしているのかと仮定し、組み合わせ的に外したところ、SSDT-EC-USBXのみを外せば、バッテリーがOSに認識され、加えてトラックパッドも認識されることがわかりました。
最後に、Wake Up後にLEDが点灯状態に戻ることが、「1_led_blink.txt」のパッチを入れることで実現できました。
以上のことを行った結果のWebページが以下のものです。
$80 BigSur Laptop(Part 2) 8000円のBigSurノートPC(その2) How to patch Laptop ACPI ノートPCのDSDT等のパッチ法
Next is the issue of power management. Even with the ACPI patch, it didn’t seem to recognize the battery in the power management in the macOS system settings. The display showed that the battery capacity was 0%, and it did not seem to be actually functioning. I wondered if there was a problem with the device name in DSDT. Therefore, I applied the ACPI hot patch of X260 and T460 in combination again, but it had no effect.
While giving up, I noticed that some generic ACPIs are related to power management. These are SSDT-EC-USBX and SSDT-PLUG brought from Dortania. Assuming that these are overriding, I removed it in combination, and found that if I remove only SSDT-EC-USBX, the battery is recognized by the OS, and in addition, the trackpad is also recognized.
Finally, it was possible to return the LED to the lit state after Wake Up by applying the patch of “1_led_blink.txt”.
The web page as a result of doing the above is as follows.
$80 BigSur Laptop(Part 2) 8000円のBigSurノートPC(その2) How to patch Laptop ACPI ノートPCのDSDT等のパッチ法

4.Clover(ACPI)関係の整理
いろいろ、いじったconfig.plistを整理していく。基本の1つは、X260用の以下のWebページのもの。
https://www.reddit.com/r/hackintosh/comments/ecyi1k/thinkpad_x260_10153_beta_the_perfect_hackintosh/
もう1つは、Hackintosh Vanilla Guide
https://hackintosh.gitbook.io/-r-hackintosh-vanilla-desktop-guide/
ハイバネートの問題アップに(効果はどうか疑問もあるが・・・)以下のYoutube
https://www.youtube.com/watch?v=nDmh8QB8Bss
以上3つのconfig.plistから作成した。パッチ等で、いらない部分は大胆に簡易にしました。
4. Clover (ACPI) related organization
Organize config.plist including various useless settings. One of the basics is the following web page for X260.
https://www.reddit.com/r/hackintosh/comments/ecyi1k/thinkpad_x260_10153_beta_the_perfect_hackintosh/
The other is the Hackintosh Vanilla Guide
https://hackintosh.gitbook.io/-r-hackintosh-vanilla-desktop-guide/
To improve the problem of hibernation (I slightly doubt the effect …) The following Youtube
https://www.youtube.com/watch?v=nDmh8QB8Bss
Created from the above three config.plist. I boldly simplified the unnecessary parts with patches.
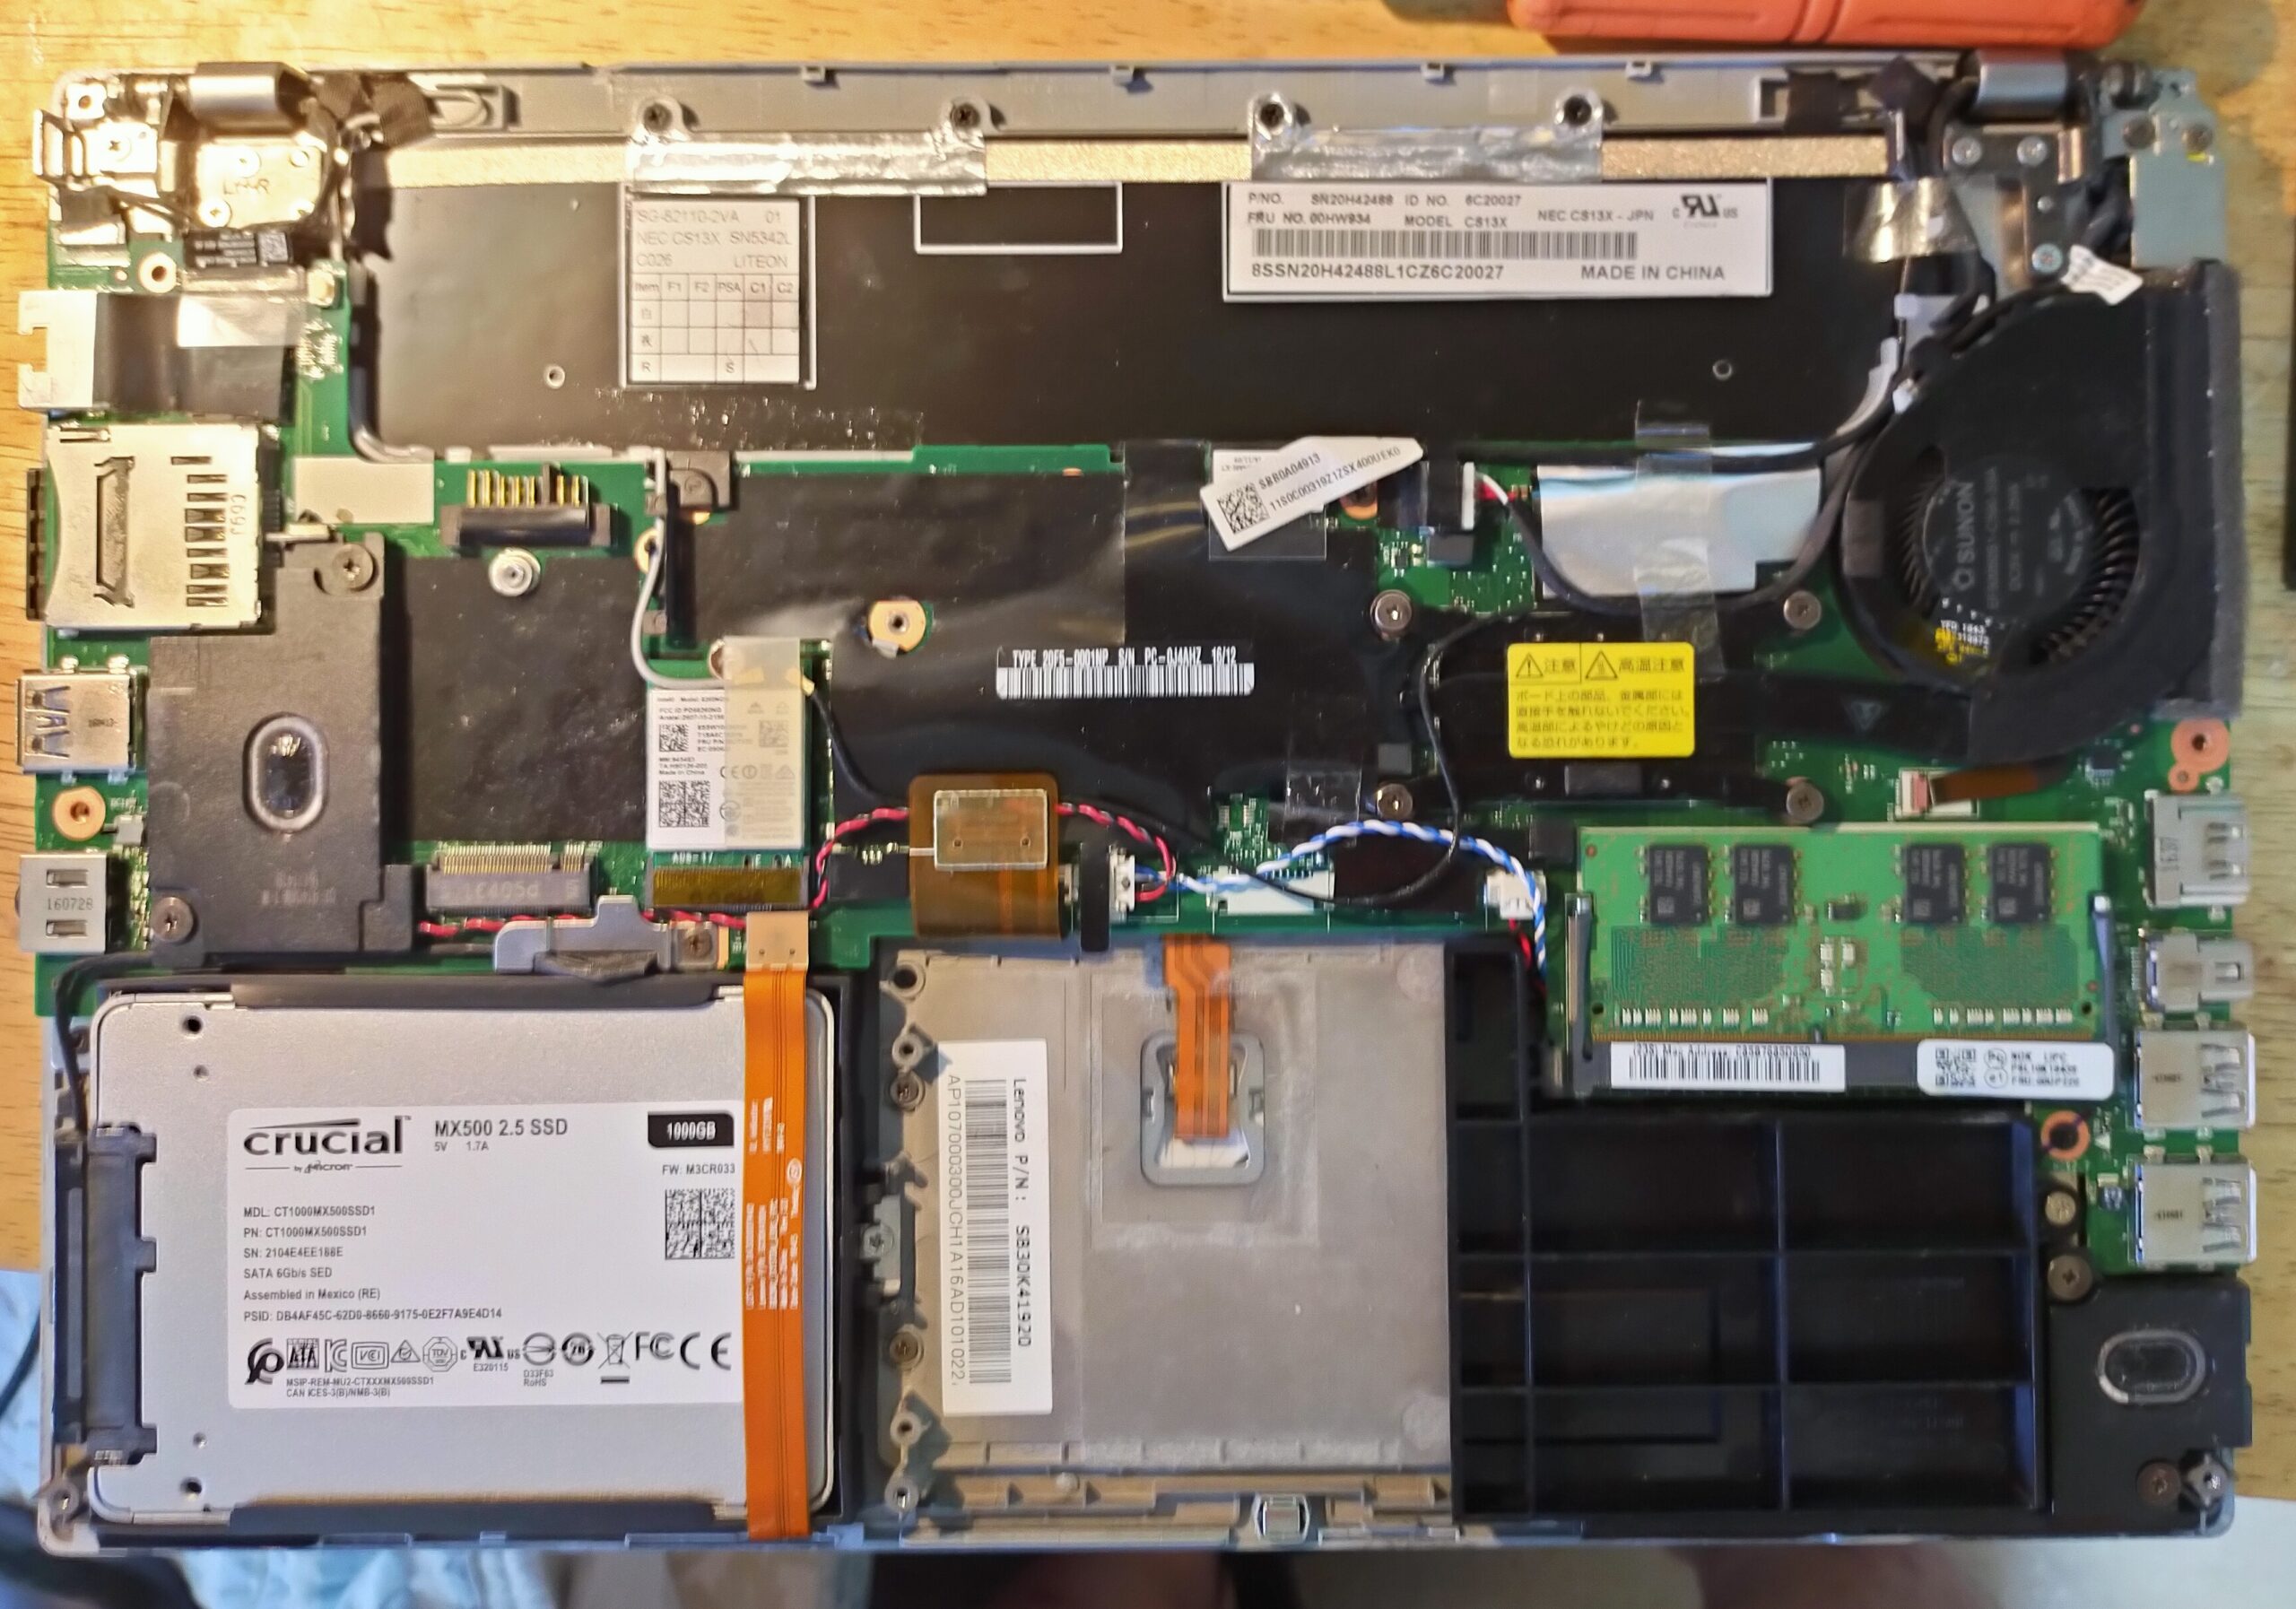
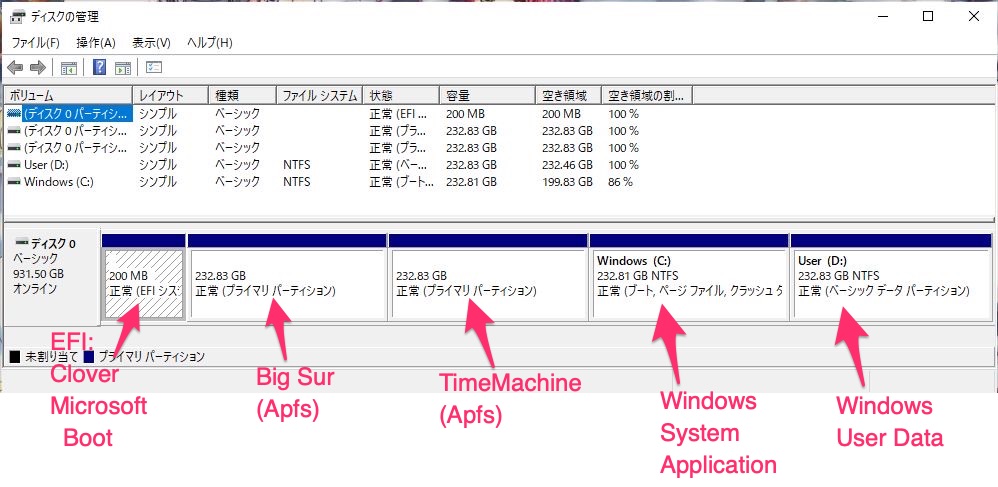
5.SSD、RAMの増設。Big SurとWindows10Proのデュアルブート
SSDとRAMを、増設しました。記事の方が写真入りで詳しいので見てください。
また、Window10Proと、BigSurをデュアルブートさせるために、SSD交換後再度、両方のOSをいれ、アップデートをかけました。そのうち、Windows 10では、Lenovoであると判断して、BIOSまでアップデートしてくれました。そのため、ACPIがアップデートされ、以前に作ったColverでは起動しなくなりました。再度ジェネリックなCloverでACPIを取得しなおし、先ほどと同じようにDSDTをパッチして、セットしたところ動くようになりました。
5. Expansion of SSD and RAM SSD and RAM have been added.And dualboot of Big Sur and Windows10 Pro
Please see the article for more details with photos. Also, in order to dual boot Window10Pro and BigSur, after replacing the SSD, both OSs were installed again and updated. Among them, Windows 10 decided that it was Lenovo and updated the BIOS. As a result, ACPI has been updated and will no longer start with previously created Colver. I got ACPI again with generic Clover, patched DSDT as before, and set it up and it works.
$80 BigSur Laptop(Part 3) ,8000円のBigSurノートPC(その3), How to set DualBoot on only one SSD, 1つのSSDのみにDualBootを設定する方法
$80 BigSur Laptop(Part 4) ,8000円のBigSurノートPC(その4), Memory replacement to 16GB メモリを16GBに交換
6.USBポートの個数制限
最後は、USBポートの個数を制限します。
HakintoolからUSBPorts.kextを作ってUSBを15個に整理する。
を参考に、Hackintoolを使って、USBPorts.kextを作って最終的なこの機体用の設定は終わりです。できたサンプルを紹介します。ただし、BIOS等のアップデートがあったため、今売っている、VK23VB-T(VK23LBZDT) に適合しないことがあります。その場合は、ジェネリックなCloverでACPIを取り直し、DSDTパッチを当てて、pachedフォルダへ入れてください。
EFI.2104151447.USB.ACPI.UsbPort.VersarproVK23LBZDT.Sample.zip
6. Limit on the number of USB ports Finally, limit the number of USB ports. Create USBPorts.kext from Hakintool and organize your USB within 15 connections.
Create USBPorts.kext from Hakintool and organize USB into 15 pieces.
Refer to the above web page, use Hackintool to create USBPorts.kext, and the final settings for this laptop are complete. Introducing the final sample. However, due to updates such as BIOS, it may not be compatible with the VK23VB-T (VK23LBZDT) currently on sale. In that case, recollect the ACPI with a generic Clover, apply the DSDT patch, and put it in the pached folder.
EFI.2104151447.USB.ACPI.UsbPort.VersarproVK23LBZDT.Sample.zip
7.OpenCoreでのブート
OpenCoreでもブート出来るようにしました。起動時はじめに、Windows,OpenCore,Cloverの選択画面が出ます。
7. Boot with OpenCore
Enabled to boot even with OpenCore. At startup, the selection screen for Windows, OpenCore, and Clover will appear.

選択すれば、OpenCoreでも動きます。
If you select it, it will also boot with OpenCore.
OpenCoreへの移行を行いましたが、以降の際に困った、XHCIからXHCへのホットパッチが事実上いらないことがわかりましたので、XHCIでまとめるようになっていますので、Cloverの方も変わっています。注意してください。
EFIを置いておきます。
(Windowsに追加するものです)
EFI.2104180420.Clover.OC.VersaproVK23LBZDT.Sample.zip