i7-3770K,B75M-PLUSのパソコンは、グラフィックボードがよければ、最新のCatalinaでも動きます。・・・の夢
alpha
Kawaiintu (neo Moebuntu)(旧Hackintosh夢日記)

1.ハッキントッシュの歩き方(3):ポストインストール~環境に合わせた設定。
1.Walking the Hackintosh (3):Post-installation. Setting up for the environment.
(1)自分の環境を知ろう(当たり前だけど)、コンフィギュレーターの用意
(1) Know your environment (as a matter of course),Prepare a configurator
CPUとマザーボードやGPUを選んで自分で作ったのであれば、使われているチップを知ったいるはずです。
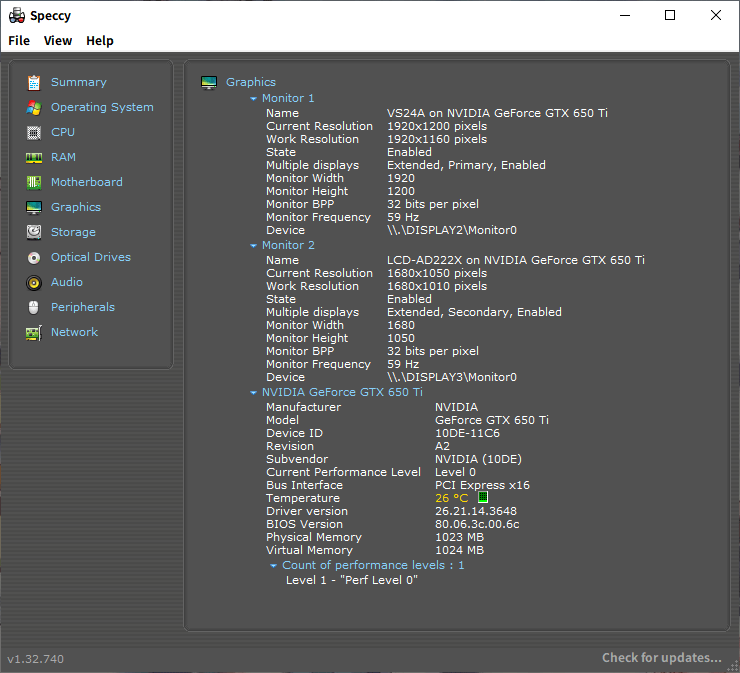
ノートパソコンだと、わからない場合も多いので、Windows上でSpeccyなどを使ったり、ドライバ情報のIDから使われているチップを割り出しましょう。
If you built it yourself by choosing a CPU, motherboard and GPU, then you should know the chip used.
If it is a laptop, you may not know, so use Speccy or something similar on Windows, or find out the chip used from the ID in the driver information.
コンフィギュレーターを用意したほうが、楽で設定をやりやすいです。もし、貴方がconfig.plistをそのままplistedplusなどで設定できるなら。間違えが減るのでそうしてもいいと思います。
It is easier to prepare a configurator to do the configuration. If you can configure config.plist directly in plistedplus or similar, you can do so as it will reduce mistakes.
有名なものは以下の通りです。
The most famous ones are as follows.
Clover Configurator (Global Edition)
OpenCore Configrator
OCAuxiliaryTools
(2)まずは、USBを制限することから始めよう。
(2) Start by limiting the number of USBs.
ほとんどのジェネリックなEFIの場合、USBはきちんと認識しておらず、USB2.0の初めのほうが認識され、キーボードとマウスが認識されているだけのはずです。むかしは、UsbInjectAll.kextとの組み合わせで制限してることが多かったのですが、今風にはUSBMap.kextやUSBPort.kextを使います。
USBMap.commandによるUSBポートの選択
HakintoolからUSBPorts.kextを作ってUSBを15個に整理する。
In most Generic-EFI cases, USB is not properly recognized, and the beginning of USB 2.0 should be recognized, and only the keyboard and mouse should be recognized. Once upon a time, I used to restrict it with UsbInjectAll.kext, but nowadays, I use USBMap.kext or USBPorts.kext.
Select USB ports by USBMap.command
Create USBPorts.kext from Hakintool to organize USB into 15 ports.
あたらしいmacOS(BigSurなど)では、USBポート数をすべて開放などができない場合があります。こういう場合は、いらないポートを少しづつ探して以下のように、ブートオーギュメントを指定しつつ調査するといいでしょう。
In newer macOS (BigSur, etc.), you may not be able to open all USB ports. In such a case, it is a good idea to search for the ports you don’t need one by one and investigate them while specifying the boot augmentation as follows.
uia_exclude=HS01;HS02;HS05;HS06;HS11;HS12;HS13;HS14;SS01;SS02;SS05;SS06(3)自分の環境にあったKextを入れる(設定する)
(3) Insert (set) the Kext that suits your environment.
MaLd0nさんのジェネリックなEFIで動いていて、すでにUSB制限のkextができていれば、UsbInjectAll.kext(USBMap.kextやUSBPorts.kextと交換する)や、いらないkextを取り除きます。OpenCoreなら、Configuratorなどで、kextをスキャンさせて、config.plistを作ります。
If you’re running MaLd0n’s generic EFI and you already have a USB-restricted kext, remove UsbInjectAll.kext (replace it with USBMap.kext or USBPorts.kext) and any other kext you don’t want. If you are using OpenCore, you can use Configurator to scan the kext and create a config.plist.
また、ACPIのamlファイルについても、MaLd0nさんのものなので、Dortaniaから持ってきて取り替えても動くと思いますので、試すのもよいでしょう。
Also, as for the ACPI aml file, since it belongs to MaLd0n, I think it will work if you bring it from Dortania and replace it, so you can try it.
(4)正しくSMBIOSを設定する。
(4) Set up SMBIOS correctly.
できるだけ、貴方のCPUに合った、iMacなどにSMBIOSを合わせることが良いです。なぜならの方が安定した動作が期待できるためです。
If at all possible, it is a good idea to match SMBIOS with an iMac or other device that matches your CPU. This is because you can expect a more stable operation.
簡単で間違えのない方法は、それぞれのCofigratorで自動的に振りだすことです。
ここで忘れがちなことは、USBMap.kextやUSBPorts.kextは、プロフダクトネーム依存だということです。コンテンツ内のプロダクトネームを直すのを忘れないでください。
A simple and error free way is to use the Configrator for each of them and automatically assign them.
One thing to remember here is that USBMap.kext and USBPorts.kext are product-name dependent. Don’t forget to fix the product name in the content.
Related Youtube